About
Blackblock has a custom dynamic loot system that can be adjusted in-game.
Moderators can open the GUI by executing the /blackblock loot command.
Explanation
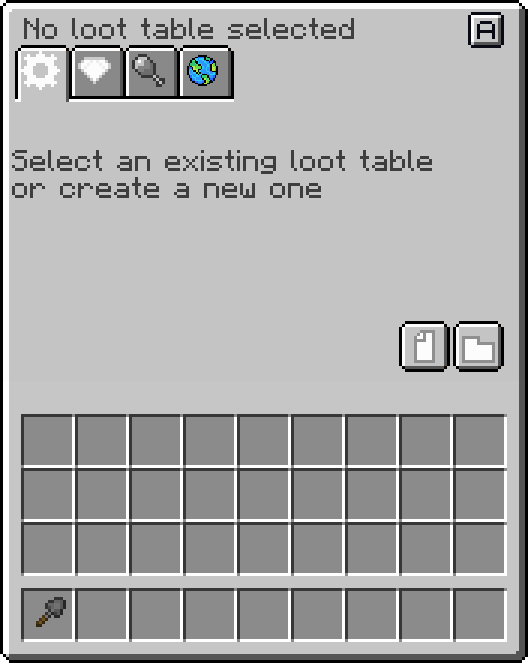
This is what the GUI looks like when you first open it.
There are 4 tabs at the top:
Main:
Contains the primary loot table configuration.Loot Entries:
Lists all possible entries for the loot table.Active Loot Entry:
Allows configuration for a selected loot table entry.Vanilla Injection Targets:
Enables you to inject the loot table into an existing Vanilla loot table.
In the bottom right you can see the Create new and the Open existing button
Main configuration tab
Once you create or select a loot table, the main tab's contents will become visible:
Minimum rolls:
Minimum amount of times something will be chosen from the table. Can be 0.Maximum rolls:
Maximum amount of times. A random number between these 2 values will be chosen.Chance:
The chance (in percentage) this loot table has of even attempting to generate loot.Operation mode:
Loot tables can run in "Item supplier" or "Block supplier" mode.Persistency:
The "Save"-like button has to be clicked once for the table to become persistent, otherwise it will be lost once the GUI closes.
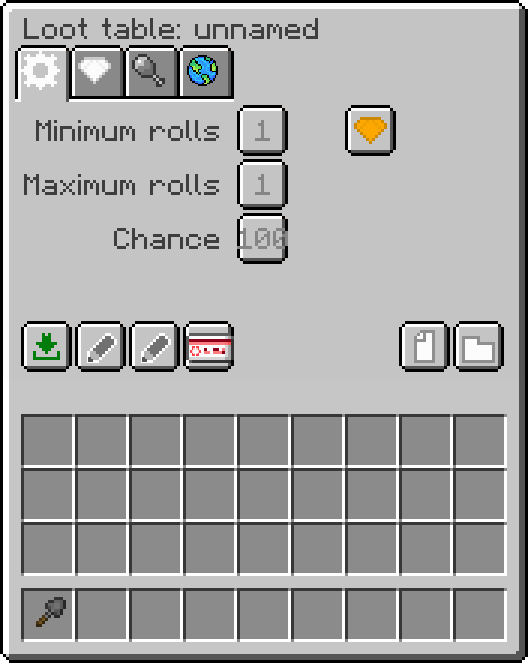
Rename:
The first pencil button allows you to set a pretty, human-readable name of the loot table.Change slug: The second pencil button allows you to change the machine-readble name of the loot table. Once a name is picked (and references are made to it) it should not be changed.
Create stack copy: Create an item representation of this loot table as it is right now. Think of it as a
Save as...feature.

After you enable Persistency, 3 things will change:
Remove persistency:
The first button will turn into a button to Remove persistency, with a red Trash iconCreate stack reference:
Similar to the Create stack copy button, but this will be a live link to the loot table. When you want to add a loot table to a Container Placeholder, this is what you want to use!Create chest stack:
This gives you a chest item with a reference to the loot table. You can place this chest as many times as you want, it's contents won't be generated until someone opens the chest. Even if you place multiple chests using this item, the contents will be different each time. This is a great way to test your loot table.
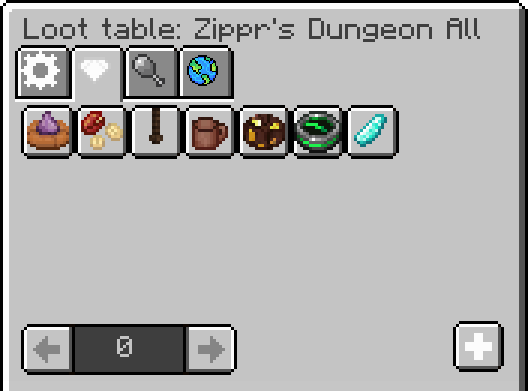
Loot Entries tab
All the availables entries are listed on this tab. Hovering over the buttons will give you more information at a glance.
Clicking on one of the entry buttons will take you to the third tab: Active Loot Entry
If you want to add a new entry, click the "+"-button in the bottom right corner.
Active Loot Entry tab
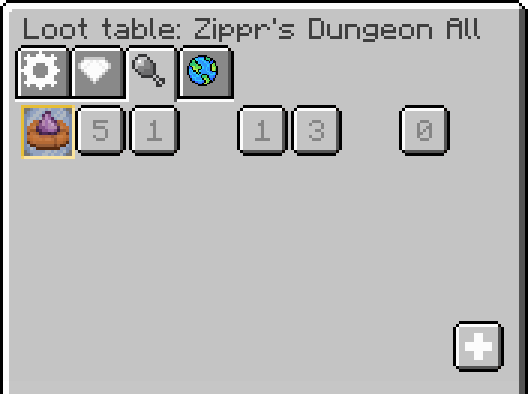
This tab looks a little utilitarian, but it gets the job done.
Mirror Slot:
The first slot is a "mirror" slot. Putting an item in it will copy that item into the slot. It represents the item to generate. The size of the stack does not matter here.Weight button:
The first button right next to the mirror slot is the Weight button, it is used to calculate the chance that this entry will be picked. The higher the weight, the higher the chance.Worth button:
Next to that is the Worth button, here you can say how much the item is worth. Should only be set for treasure, as the system will try to pick at least 1 item that is worth something.Minimum stack size:
When this entry is picked, the system needs to decide how many items of it to actually generate. This is the minimum amount desired. Can be 0.Maximum stack size: The maximum-equivalent of the minimum stack size. When the entry is picked, a random number between the minimum & maximum will be picked. If that number is 0, nothing will be generated.
Item generation limit:
The last button on this tab: this is a global limit on the amount of items that can ever be generated for this entry. Be aware that testing the loot table will also count towards this limit.